
Broken sunroof knob: 40 years of plastic-on-plastic finally gives out

0
0

The OEM sunroof was never great to begin with. It rattles, it barely stays sealed, and — as it turns out — it hides the worst plastic-on-plastic internal gearing mechanism that could possibly have been invented. I hope whoever engineered this part got a demotion, or at least learned to do better, because it has always sucked. Mine finally broke after 40 years.

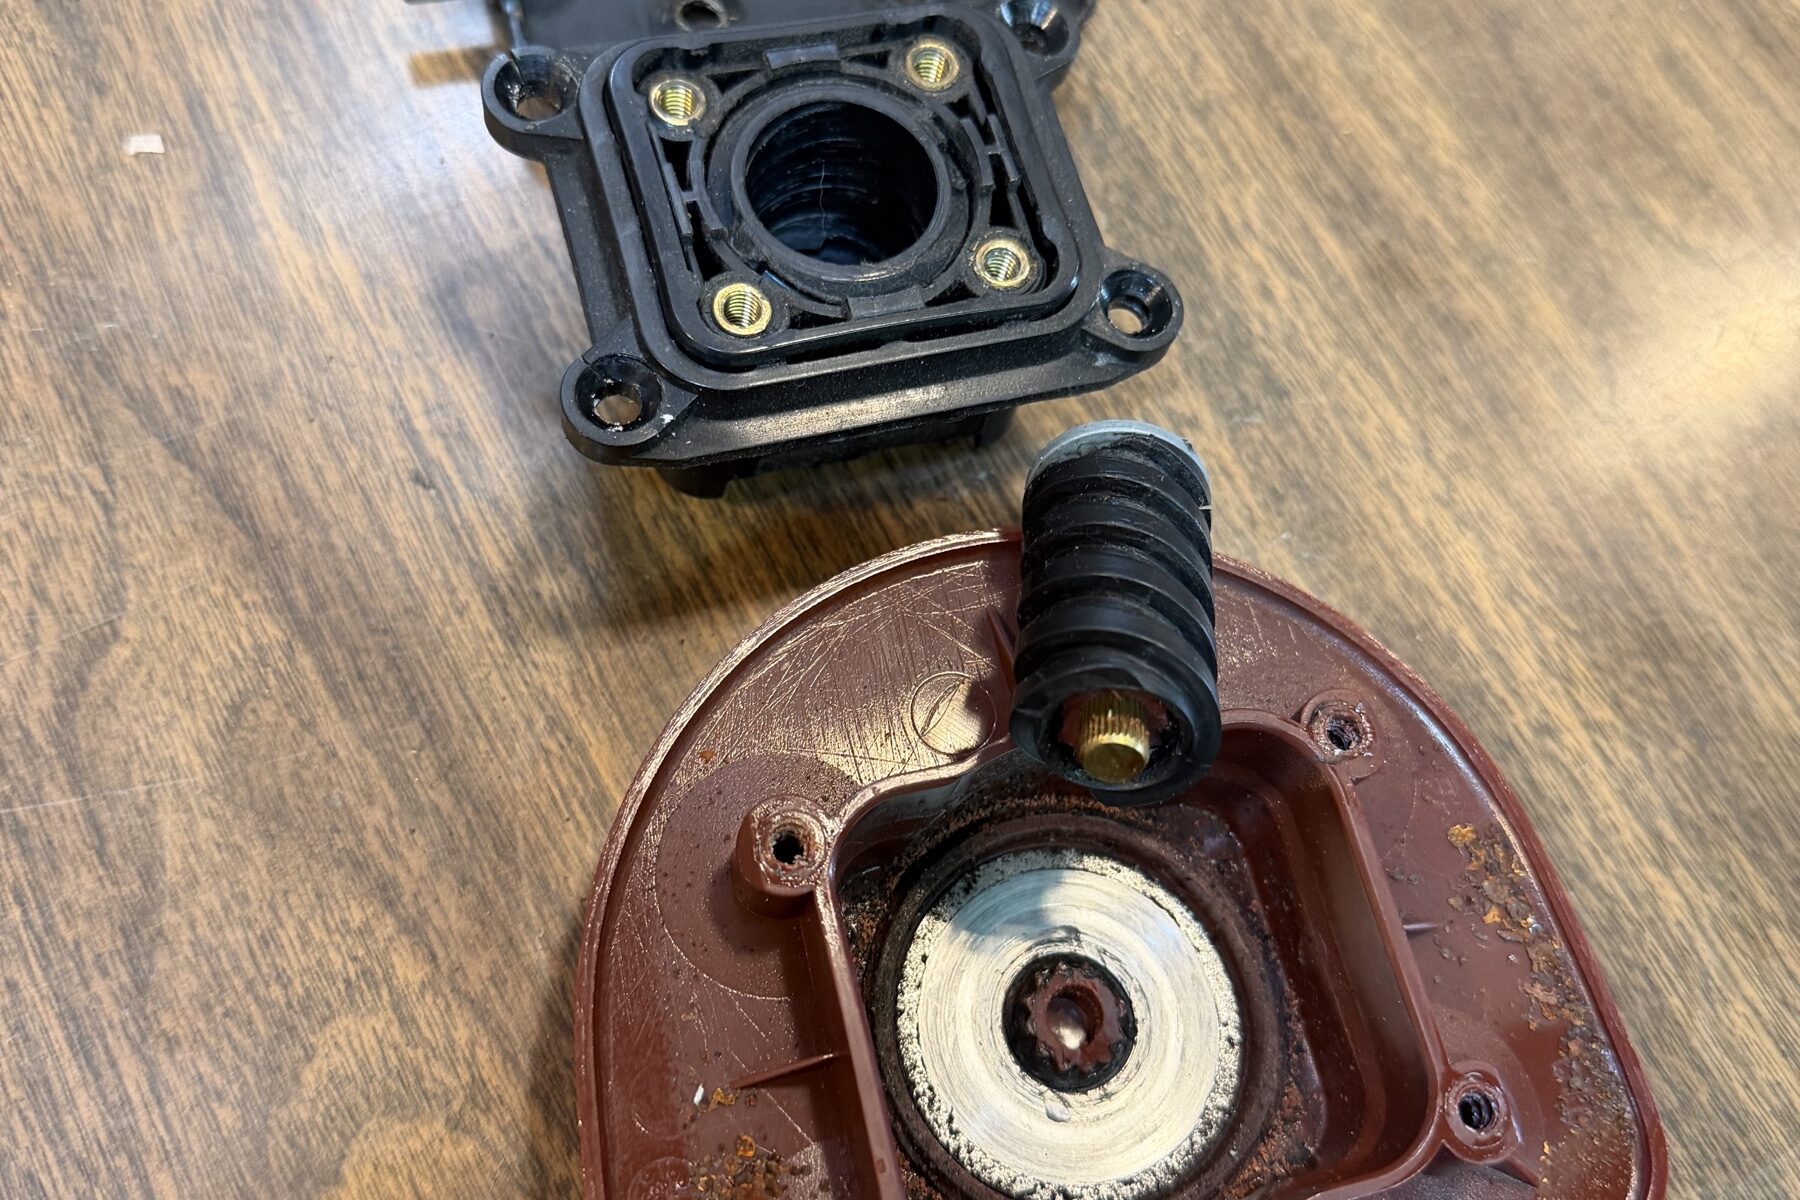
The broken sunroof knob assembly, disassembled on the bench The crime scene. Mounting chassis up top, spinner knob below, worm gear pulled out of what’s left of its seat.

Shouts to Mikey’s rotary in Battleground, WA, who came through with a 9 p.m. replacement the night before a road trip. That’s the kind of parts run you don’t forget.

What actually breaks

Inside the mechanism there’s a center column: a plastic spline that sits inside a plastic worm gear. That spline seats into a plastic receiver on the spinner knob — the part you turn from inside the cabin. The receiver in the knob is what broke on mine.

Worm gear with the stripped receiver material stuck to its core The worm gear’s core, wearing the remains of the knob’s receiver like a trophy. That red plastic used to be the part that transfers all the torque.

I thought about repairing it, but the way this thing fails, there’s no saving it. The receiver is what takes every bit of torque you put into the knob, and once it’s stripped, the knob just pulls right off the spline the first time you spin it. A replacement part is what’s in order.

Replacement unit next to the disassembled broken one Replacement unit assembled on the left; the old one in pieces on the right, as found.

The swap

The replacement is straightforward:

  1. Take off the top seat — four screws.
  2. From the top, remove the four screws holding the knob to the chassis. The whole unit drops right out.
  3. Reinstall in reverse.

Roof rail opening with the unit removed Unit out, hole in the roof rail exposed. The square gasket frame seals the chassis to the panel — don’t lose it.

One thing to get right: when the top seat goes back on, orient it so the protruding corner notch is on the driver’s rear side. (Eagle eyes will notice mine is backwards in these photos — do as I say, not as I shot.)

New unit installed in the roof rail New unit seated and screwed down from the top.

Interior view of the spinner knob through the headliner The business end: the spinner knob back in its home in the headliner, latches ready.

If you can’t find a replacement that color-matches your interior, don’t worry — SEM makes color-match interior dye for any color interior you might have. (Regular readers know I’ve been down the SEM road before; done right, it holds.)

Bonus: killing the rattle

While you’re in there: I like to put felt pads between the glass and the lifter. It mitigates about 50% of the rattle — which, on this sunroof, is saying something.

Sheet of adhesive felt pads next to the top seat Hardware-store felt pads. The cheapest NVH fix on the whole car.

Three felt pads applied to the top seat Three pads on the lifter seat, waiting to meet the glass.

Glass resting on the padded lifter Glass back on, pads sandwiched where the rattle used to live.

Selene, rear three-quarter view in the garage Back together and road-trip ready.

Catch you on that next lap. Brap on.